

Here I will be showing a way to make an image look like it has a gradient on it, without having to use the gradient tool to do it. It is fairly simple, and can make nice "gradients" once you have gotten the hang of all the steps and have found what settings work the best for what you want.
What You Will Need
- Gimp
- An Image
How to Make a Fake Gradient:
Step one:
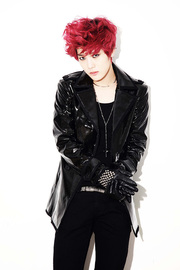
Open gimp, then click on the file tab on the top toolbar so that you can select the "open" option. Select the image that you want to work with. Here is the image that I will be using for this tutorial.
Step two:
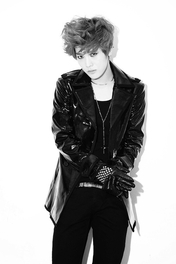
Now, you must make you image black and white in order for the gradient to work right so go to the top toolbar and click on Colors. Once there, select the "Desaturated" option. This will give you a pop up window, which will give you three options to choose from. For this tutorial I used the "Luminosity" option to make my image look like this.
Step three:
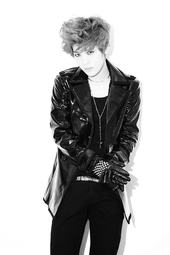
After you have made your image black and white, you can choose to make you image lighter. To do this, you will need to go to the top toolbar where the Colors tab is and click on the "Curves" option. Move the curve to change the lightness of the image until you are satisfied with it. Here is my image after using the Curve option to make my image a little lighter.

Step four:
Now you will need to make a new layer, and then you will be going to the color palette where you will be dragging the white color onto the layer. Then, go to the layer box so that you can change the layer mode from "normal" to "soft light." You can then change the opacity however you like.
The soft light option makes the image look brighter, just like how my image looks much brighter than it did in the step before.
Step five:
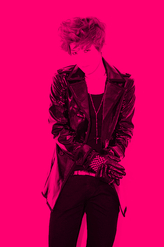
Now do the same thing that you did in the previous step. For this, I am using pink but you can use any color you want to use. Now, go to the layer mode and change it to "multiply." As like the previous step, you can change the opacity but you shouldn't lower it too much. If you want to it even lighter you can use the Curve option again.
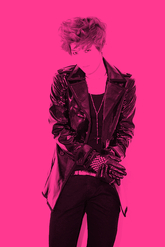
Step six (Optional):
You can change the opacity to make the gradient lighter, but you shouldn't lower it too much. If you want to make the image even lighter you can use the Curve option again. This is how my image looked at the end of this tutorial and this step.

