
What You Will Need
- Gimp
- Two images
How to Blend Two Images Together
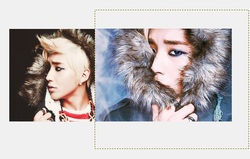
In this tutorial I will be showing you how to blend two separate images together to make one that will look similar to the image you see above. This is a fairly simple tutorial that is easy once you figure out how all the steps work together.

Step one:
Open gimp and create a new canvas, then go to file and click “open as layers” to open the images you want to use.
Step two:
Arrange the photos how you want them. Here I want to blend the blue one into the brown, so I have shifted the image over the other.
Step three:
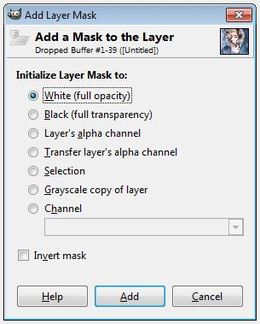
Select the layer you want to blend (here it is the blue one). Right click, and select “add layer mask.” You will see the shown window, in which you will need to click the first selection (white “full opacity”).
Step four:
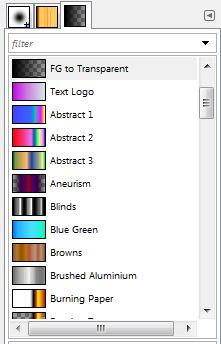
In the toolbox, select the gradient tool - make sure your foreground color is black, and the background color white - then click on the gradients tab to choose the FG to Transparent option.
Step five:
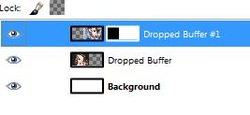
Click you layer tab to click on the mask (white box/layer) next to your image. You will be blending this so be sure that it is selected. You can tell if it is selected by the green ticks that will be surrounding your layer.

Step six:
Click and drag to select how big you want to blend. Do this as many times as needed to get the desired blending.Once you have your desired blending, save in the form that you want - or do any additional changes - and you are finished!

This is how my image turned out at the end of the tutorial!
